How to choose the right helmet

Even if you were busy scribbling your name on the desk with a compass during biology classes at school, you would know that the brain is the most complicated and fragile organ in the human body and therefore it follows logically that the choice of a safe, well-fitting and appropriate helmet is the most critical aspect of being a motorcycle rider.
A quality helmet can be the critical the difference between a life and death situation. So choosing the right helmet is the most important decision a biker ever makes, sometimes even more than choosing a motorcycle!
There are three key aspects to focus on while choosing the right helmet:
- Safety Ratings and Certification
- The fit of the helmet
- The type of helmet
1.Safety Ratings and Certification
There are two main types of Safety ratings & Certification. One is a country level standard which is then followed voluntarily by helmet manufacturers without onvolving any kind of batch testing. The common ones here are the DOT standard as followed in USA, the ECE22,05 in Europe and our very own ISI:4151 which is based more or less on the European ECE 22.05 standard.
Usually helmets which have both DOT and ECE22.05 certification are considered safer than ones with just one type of certification. The important point to keep in note here is that the relevance of these certification is largely dependent on the reputation of the manufacturer since this is a voluntary certification.
The second type of rating is the one provided by third party organizations following actual batch testing of helmets. One such rating organization is SNELL in the USA and SHARP in the UK. Both maintain a database of helmets and the associated rating obtained by the helmets in their tests. The manufacturers then have to pay a royalty fee to use these certification as a sort of badge of honour on their helmets. The popular Bell RS-1 helmet is an example, which has DOT as well as ECE certification and a SNELL 2010 M certification to boot.


2.The fit of the helmet
According to Bell Helmets Europe, one of the leading manufacturers of motorcycle safety helmets, there are five key steps in determining proper helmet fit:
- MEASUREMENT
- TRY ON
- HORIZONTAL AND VERTICAL MOVEMENT CHECK
- RETENTION CHECK
- PRESSURE POINT CHECK
a)Measurement
Measuring the head is a starting point for the entire sizing procedure. Due to varying shapes, heads that are apparently the same size when measured by a tape may not necessarily fit the same size helmet. The circumference of the head should be measured at a point approximately two centimeters above the eyebrows in front and at a point in the back of the head that results in the largest possible measurement. Take several measurements to make sure you have the largest one.
b)Try On
Once you have determined your preliminary tape measurement, select the helmet that is closest in hat size to the tape measurement and try on the helmet. If it is between sizes, round up to the next largest one. The correct procedure to put on the helmet is:
1. Grasp the helmet by the chin straps, with the front of the helmet towards you and the top of the helmet facing down.
2. Place the thumbs on the inside surface of the straps and balance the helmet with the index fingers.
3. Spread the helmet apart with the hands, and slip down over the head.
If the helmet slides down on the head with no resistance, you have your first indication that it may be too large. Obviously, if it will not slide down over the head at all it is too small. Many people unfamiliar with helmets are reluctant to pull down if they meet resistance as the helmet goes on, however if it is just snug going on, we recommend to get the helmet on. Only if the helmet is impossible to put on should you move up to the next size, as helmets that go on snug generally fit very well once all the way on. It is a fact that most people will select a helmet that is too large for them, if left to make their own choice. The eyes should be approximately in the center of the eye port with the top edge of the liner padding just above the eyebrows.
c)Checking Horizontal And Vertical Movement
Once you are wearing the helmet, you should look carefully at the way it fits. Check to see if the cheek pads are in contact with the cheeks. Is there excess pressure on the cheeks ? Look for gaps between the temples and the brow pad. Check the back of the helmet where the neck roll (if the helmet has one) makes contact with the neck. Does it touch at all? Or is it pushing the helmet away at the rear causing it to roll down over the eyes in front After you have made your visual check, grab the helmet in your hands - one on either side - and while holding your head steady try to rotate the helmet from side to side. Note any movement of the skin while doing this, as well as the amount of resistance to movement. Next, check movement up and down, again noting skin movement and resistance. If in either test there was little or no skin movement, and/or the helmet moved very easily, the helmet is too large. A properly fitted helmet will cause the skin to move as the helmet moves. And, it will feel to the wearer as if evenly distributed pressure is being continuously exerted around the head.
NOTE: Helmets are a little like shoes, in that they do break-in a little. For this reason the best attitude to have when fitting is that the helmet should be as tight as the customer can stand to wear it.
d)RETENTION CHECK
This test may be a little uncomfortable, but it is very important to check. Fasten the chin strap tightly fastened, hold your head steady, and grab the rear bottom edge with your fingers. Then try to roll the helmet off your head. If it comes off, it is undoubtedly too large. WARNING: Do not buy a helmet that can be rolled off the head with the strap fastened.
e)PRESSURE POINT CHECK
Finally, unfasten the chin strap and remove the helmet. Immediately after the helmet has been removed, observe coloration of the skin of the forehead and cheeks. A reddening of the skin in a small area may indicate a pressure point. Pressure points sometimes are not noticed by the wearer for several minutes, or even hours later. They sometimes cause headaches, and are at the least, uncomfortable. If you notice a pressure point, but cannot remember experiencing discomfort there while wearing the helmet, put the helmet back on for a few minutes, paying particular attention to the anticipated pressure point. If you experience complains of pressure point discomfort either time, go to the next larger size, repeating steps four and five.
f)CONFIRM PROPER FIT
The best way to evaluate proper fit is to try on helmets that are one size larger and one size smaller than the one you think is right. Keep in mind, people gravitate toward larger sizes.
(Fit guide Source: Bell Helmets EU.)
3. The Type of helmet
The most basic way of classifying helmets is by the shape – an open face helmet which is of two sub types – a half helmet and a ¾ helmet, a modular helmet, in which the chin guard area typically pivots up and finally the full face helmet.
Generally a full face helmet is considered to be the safest kind of helmet irrespective of safety ratings and the half helmet is considered the least safe.
The second way of classifying helmets is by the type of use:
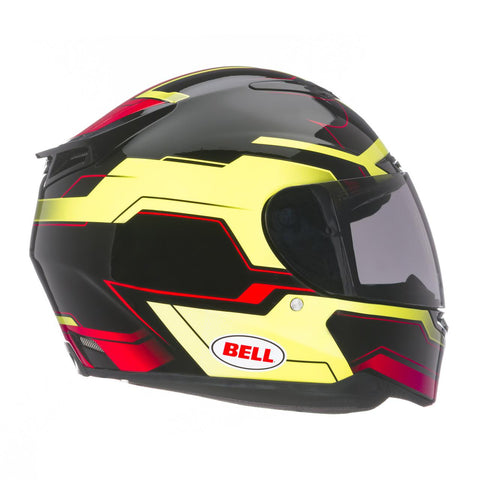
A Sports or racing helmet takes into account the slightly leaned forward of full tuck position as oe rides a sports bike, accordingly, the air vents and the aerodymanic shape of this helmet is designed with this specific riding position in mind.
An upright riding position helmet is the one designed for the upright or classic bike riding style.
Then we have a touring helmet is which is typically meant for long distance tourers and therefore for day long riding comfort.
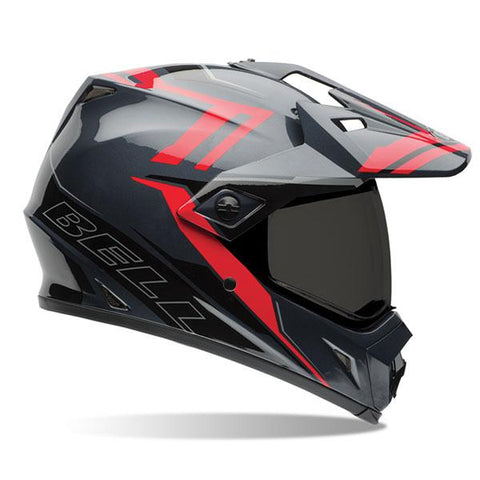
Finally we have the dual sport or MX helmet, made popular by Moto cross and favoured by off-roading bikers.
So there you have it, hope this article helps you in prioritizing your choice of helmet based on your preferences and riding styles. One parting thought is about the choice of colours – high visibility helmet colours or decals are preferable because they help you be visible on the road to other road users. A black helmet with a balck jacket and a black bike might look cool, but it will always be a lot ess safer compared to high visibility riding gear. In the words of Chris Sackett, vice- president of Bell Helmets, “Dress for the crash, not the ride.”
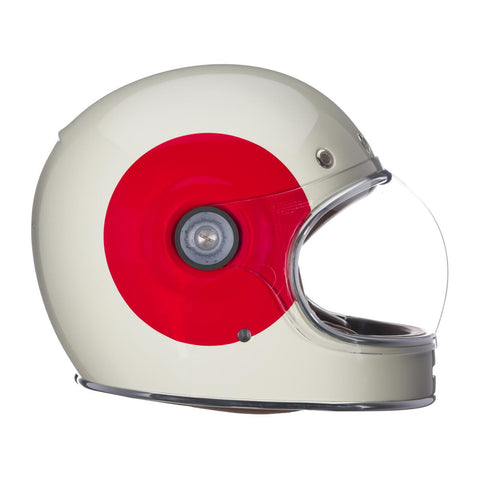
The Bell Bullitt: An Upright Riding Position Helmet
The Bell MX-9: A Dual Sport Helmet
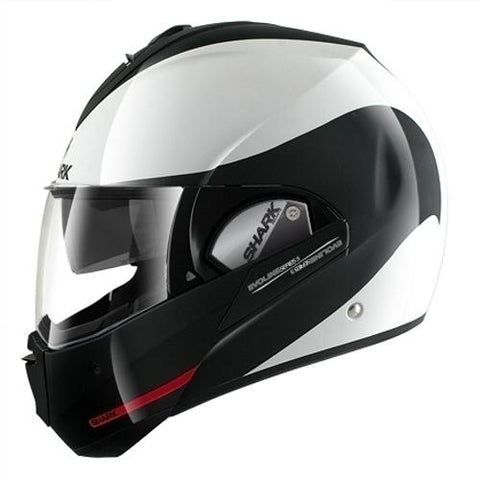
The Shark Evoline: A modular Full Face Helmet
The Bell RS-1: A Sports Helmet
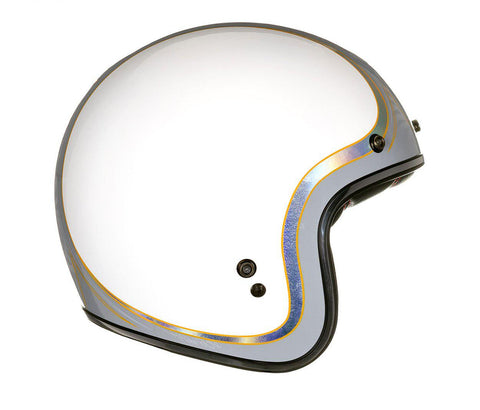
The Bell Custom 500: An Open Face 3/4 Helmet
